
You might have heard these words before: soaking, sprouting and fermenting. I am pretty sure that they sound a bit intimidating. Rest assured that once you learn the why behind these techniques, you'll be interested in starting to use them at home. Some foods like grains (eg. wheat, oats, rice, corn, barley), pulses (eg. dry beans, lentils, chickpeas, dry peas), nuts and seeds need special preparation so the mineral content in them becomes bioavailable, which means that your body will be able to actively use it. Foods like dairy and vegetables also benefit from techniques like culturing and fermentation, because they increase their nutrient value.
Soaking
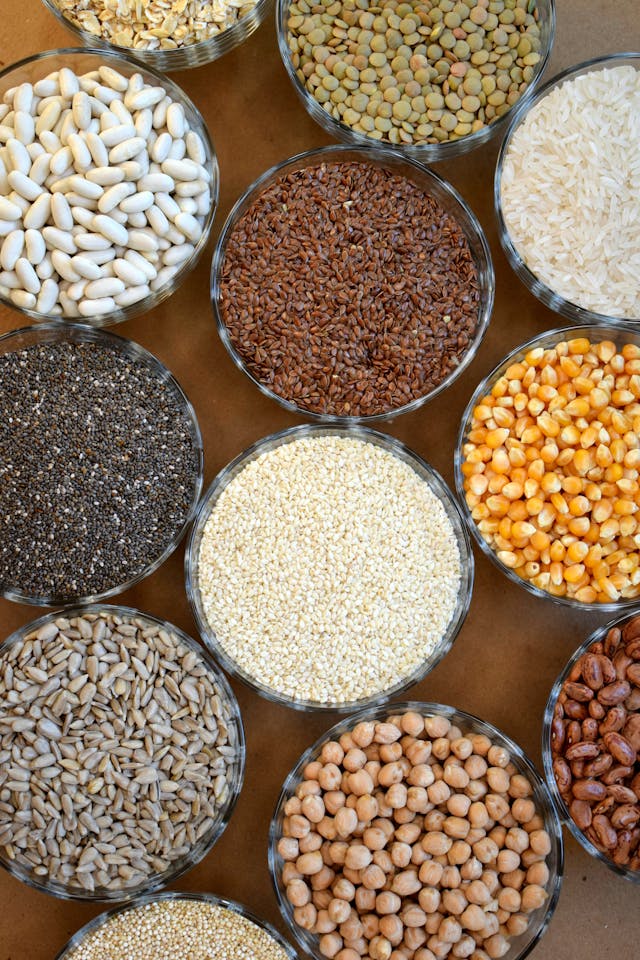
Three steps are key for soaking: moisture, warmth and time. Soaking grains, pulses, nuts and seeds deactivates food phytate and releases minerals. Some people like to add vinegar to warm water, others use only warm water for this process. Another suggestion of use is to add baking soda to soaking water to help with the breakdown of raffinose, a complex carbohydrate found in beans and pulses that leads to flatulence and makes these foods difficult to digest (NTA, 2020).
How it works
Soaking requires time and planning, some have to stay at room temperature overnight or up to 12 hours.
To soak your grains you have to measure and put them in a bowl, covering them with 1 ½ times their measured volume with hot water (113 - 131 degrees fahrenheit). Cover the bowl and leave it in a warm place in your kitchen for at least 8 and up to 24 hours. After this time you can drain the water and cook your grains. Tip: adding bone broth in place of water makes it a delicious - and nutritious - alternative!
To soak pulses, first you have to measure them and check for stones, pebbles and other debris. Use a colander to rinse them and place them in a bowl. You will need 4 times the amount of water for this (1 cup of beans = 4 cups of water). Add a pinch of baking soda to the water, cover the beans and let them soak just like you would for grains (8-24 hours). Rinse them well after this time and cook them as you usually would do.
Soaking nuts follows basically the same process. The water ratio is 1 ½ times their measured volume (1 cup of nuts = 1 ½ cups of water, 2 cups of nuts = 3 cups of water). You can add salt if you'd like. Cover, leave it on a warm spot in your kitchen from 3 to 14 hours. Large nuts will require more time than small nuts and cashews, which are steamed at harvest. Drain using a fine mesh strainer and eat as is or dehydrate for 12 to 24 hours. You can store the nuts in the refrigerator or in the freezer.
Sprouting
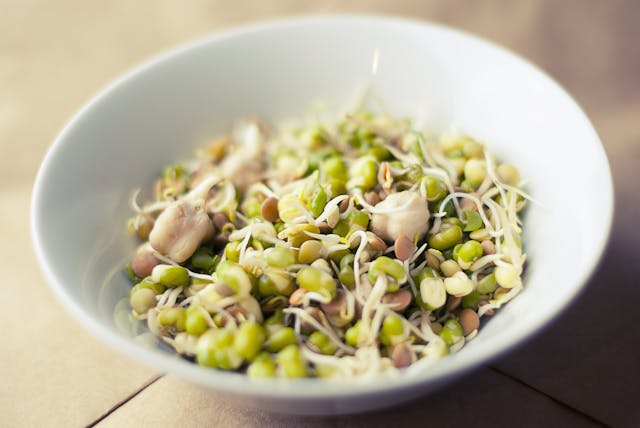
Sprouting is the process of activating grains, nuts, and pulses (which are all seeds) to transform them from seed to plant (how cool is this?). This process usually takes a few days and some patience, but it could start as a nice project with kids! By sprouting we can also deactivate phytates and lectins, making the minerals more available, and also increasing nutrients like folate. Time here is a big deal: if you let pulses and grains sprout for too long, they might be vulnerable to mold formation and lose their appeal (beans can become mushy or sticky, for example). It is best to eat sprouted pulses after cooking them for at least 10 minutes after the sprouting process.
How it works
Soak grains or pulses in cool water (here is an important difference from the soaking method, which uses warm/hot water) for 8 to 12 hours. You can use 3 parts of water to 1 part of grain or pulse (1 cup of lentils = 3 cups of water). Drain and rinse well. Place food in a mason jar and cover with a sprouting lid or a piece of muslin with a rubber band.
Fermentation and culturing
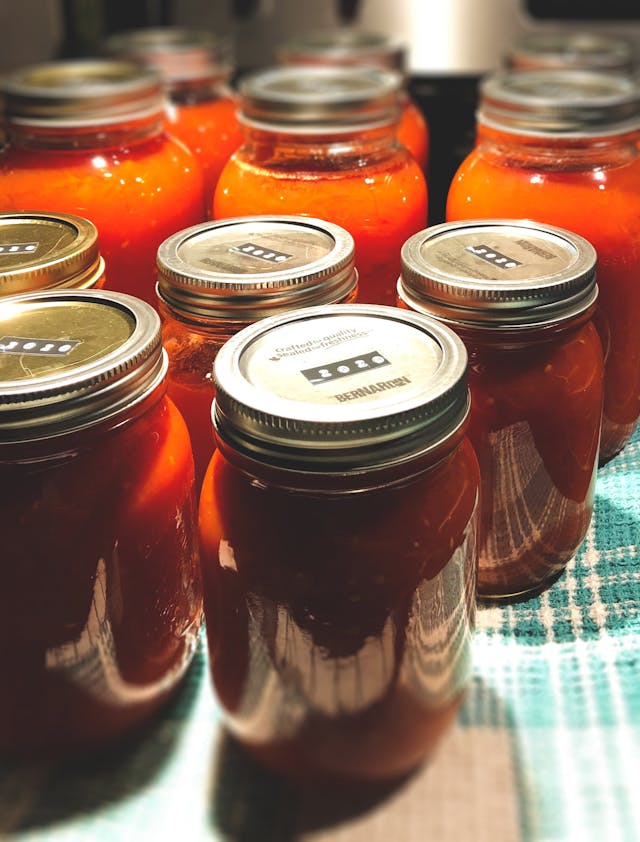
I fondly remember helping my mom as she was canning pickles when I was a little girl. I really enjoyed the process and the flavor we used in many ways in our home, from eating it plain to adding to recipes and sandwiches, or even gifting friends. The fermentation process is not something new, it's been widely used across the world, turning cucumbers into pickles, cabbage into sauerkraut, grains into beer and bread, and milk into yogurt or cheese.
There are great benefits for including fermented foods into our diet, from gut health to mental health and cognitive function. Good bacteria eats the carbohydrates from the foods, releasing lactic acid which helps preserve it. Ferments are sour, and their acidity helps to clean the palate after rich meals (so amazing!). The downside is that some people, especially those with histamine issues, may have problems with this type of food preparation, some people also just do not like the taste due to the saltiness.
How it works
Root vegetables and cruciferous vegetables like cabbage, kohlrabi, and turnips are great choices for fermentation, usually shredded and combined with salt, then packed tightly into a jar. Small jars can ferment in weeks (think of a quart or less), but large batches of several gallons can take months to ferment. Cucumbers, carrots, garlic and hot peppers are naturally fermented pickles, just stuff them in a jar, add spices of your choice, and cover them with a brine (about 2 tablespoons of sea salt dissolved into 1-quart water. Seal the jar and let it ferment from 1 week to months, depending on how sour you want it to be. To make sure this process works well you have to submerge the foods and do not expose them to oxygen. If your food smells or tastes bad, not only sour and fermented, or is slimy, just throw it away!
References:
Harvard School of Public Health. January 2022. Are anti-nutrients harmful?
Nutritional Therapy Association. 2020. Culinary Wellness Student Guide Pt.1, 124-133.